
help.sitevision.se always refers to the latest version of Sitevision
Blog - Content
Under the tab Content you select how the blog post is shown. You choose what you want to see and what it should look like. By default, the publish date, article image, article title, article content and comments are shown.
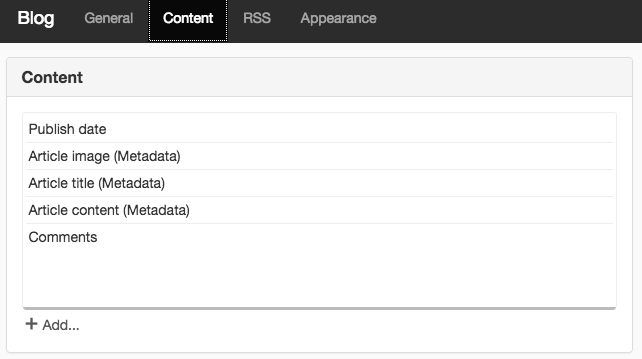
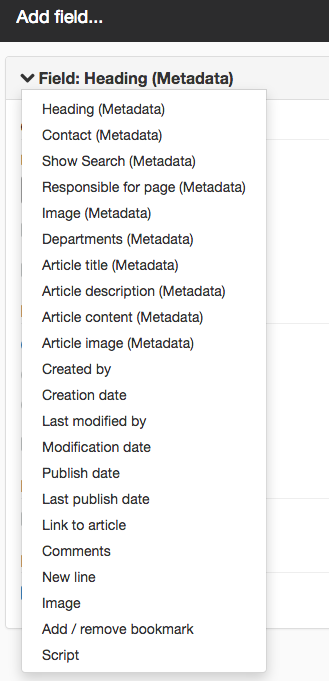
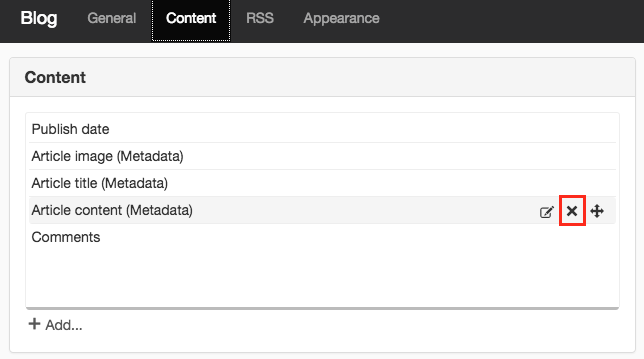
If you do not want to use these settings, you can change these by selecting content in the list and removing it with the X on the right or adding other content using the Add link. To change the order in the list, drag and drop the content to the correct location. You can add the following fields:
You can make settings for each content selected in the list. For example, on the Publish date, you can edit font or choose a different date format.
Publish date
First select the Publish date from the list and double-click on the text. Now you can see and change settings for how dates are shown and behave.
Font
Here you can set which font to show the date with.
Date format
- month/day/year
- month/day/hour hour:minute am/pm
- Relative date format (e.g. 2 weeks ago)
- Use other format - Here you can specify how you want to print the date. Follow Java SimpleDate Format standard: http://docs.oracle.com/javase/7/docs/api/java/text/SimpleDateFormat.html
 External link, opens in new window.
Insert new line automatically
Choose whether to insert a line break after the date or not. This is ticked by default.
Article image (Metadata)
Select the next value in the list, Article image (Metadata) ,
Scale image
Here I choose to scale the image to max width 160 px.
Alignment
Then I choose to set the alignment to the right.
Article title (Metadata)
Mark the next value in the list Article title (Metadata). This retrieves text from the text module Heading from the template.
Apply font
Sets the font that you want the heading to appear with.
Crop if too many characters in text
Here you can limit the number of letters in the text.
Always link text
Select this and the Link to article option to always get a linked heading to the blog post.
Insert new line automatically
Choose whether to insert a line break after the heading or not. This is ticked by default.
Article content (Metadata)
This retrieves text from the text module Content from the template. Remove it with the check box on the right (if you do not want to see more text from the blog post).
Article description (Metadata)
This retrieves text from the text module Description from the template.
Font
Sets the font that you want the description to appear with.
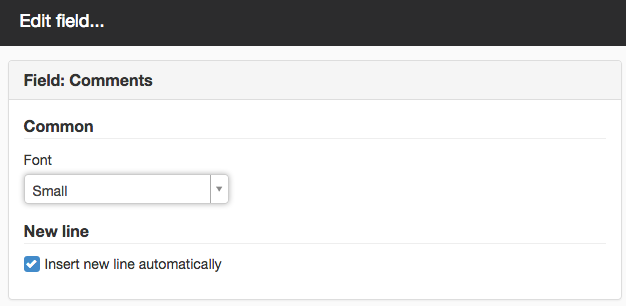
Comments
If you use the Comments module together with the blog module, you can view the number of comments that are available for the blog post. You can only set the style sheet for comments and whether to insert a line break.
Script
Under the velocity tab you can fill in the html code for what you want to achieve. For example, a border.
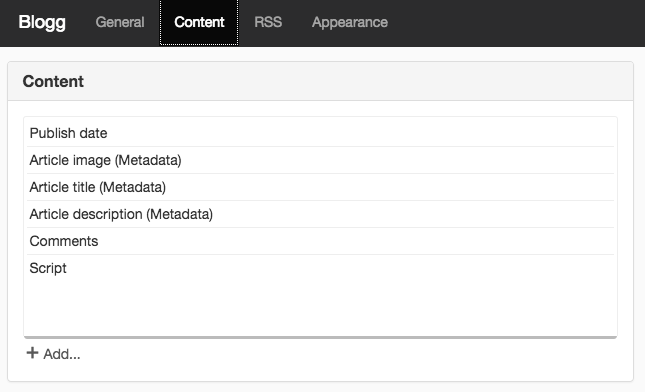
The result of these changes is that the following appears in the list under Content:
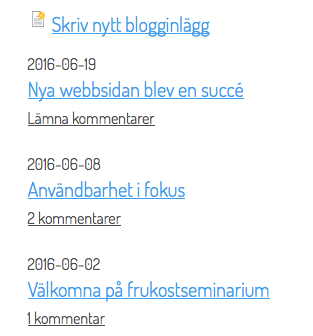
And the result online:
The page published:
 Print page