

Guide: Exporting/Importing a Website
To create a copy of a website in Sitevision on another server or the same server, use the Import feature. Access to these features can be controlled by permissions, but the SVA files generated by the export are accessible only to the system user.
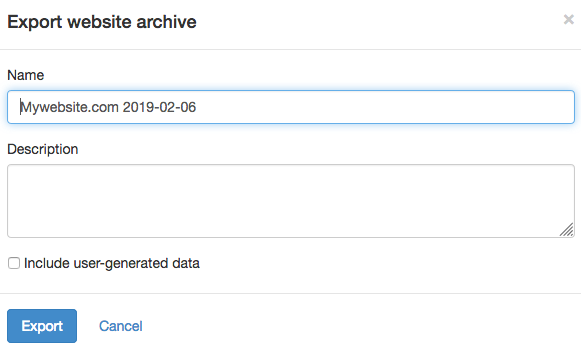
Name
By default, the name of the website to export is given.
Description
Any description
Include user-generated data
Here you can choose whether to include hosted user-generated data. The following information is included as user generated data:
- answers to surveys, questionnaires and web notifications
- rating
- bookings
- favourites
- subscribers
- page comments
For websites where Social Collaboration is enabled, the following is also included as user generated data:
- social users
- group pages
- tags
- notifications
- like
- comments
- timeline posts
- images and files
When importing, you can choose whether or not to include any exported user-generated data.
Click OK to start the export. When the export is complete, a confirmation message appears.
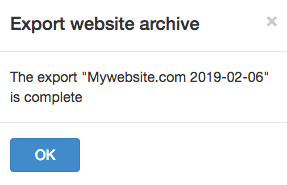
A .sva file is then created in the folder <webbplats/webdav/data/archive>. If the database is large, multiple SVA files can be created. They will then have the extensions .sva, .s01, .s02 etc. All files must be included on import.
The export may take several hours depending on the size of the database. If the database is large, it may be useful to make the export at a time when the visitor number is low so that it does not "slow down" the website.
The system user can see the file under: <url>/webdav/data/archive.

This function requires you to login as the system user.
Import Pages
The Sva file is a copy of a Sitevision website that is created via an export. The Sva file is imported to a new or same Sitevision server.
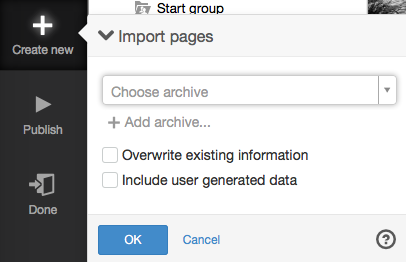
Archive (sva files)
The list displays the SVA files that are on the server. For example, if you exported from the same server, that file is available here. If the file you want to import is not in the list, click Add archive to upload a file.
Overwrite existing information
If you choose to check "Overwrite existing information", the information contained in the SVA file will overwrite any existing information on the server. If you do not check the box, you will get a duplicate of the website on the server and it creates new ID numbers for pages, modules, metadata, images etc.
If you have created your own scripting solutions that refer to certain ID pages or similar, it is important that the"Overwrite existing information" box is checked so that the website has the same ID number. However, you may not be able to import it on the same server because you do not want to overwrite an existing website.
Include user-generated data
When importing an SVA file that contains user generated data, the "Import user generated data" check box is checked. The following information is included as user generated data:
- answers to surveys, questionnaires and web notifications
- score
- bookings
- favourites
- subscribers
- page comments
For websites in the Sva file where Social Collaboration is enabled, the following is also included as user generated data:
- social users
- group pages
- labels
- notifications
- like
- comments
- timeline posts
- images and files
The "Include user-generated data" check box is only available if the SVA file contains user-generated data.
Once the import is complete, you can update the tree in the Navigator by right-clicking the server item. Your imported website will then appear at the bottom of the structure.
Multiple SVA files
Large websites will be split into multiple SVA files. The number of files depends on the size of the website. The files have the file extension .sva, .s01, .s02 etc. When importing, all files must be imported.
Click on Add website archive, see above, and select and add all the files you received on export. The files will be uploaded sequentially. When all files have been uploaded, the website will appear in the list under Import pages.
The page published:
 Print page
help.sitevision.se always refers to the latest version of Sitevision