
help.sitevision.se always refers to the latest version of Sitevision
Practical preparations
Start with the practical preparations:
- Make settings for increased accessibility
- Add colors
- Set font
- Add the required metadata to the template build.
All this to facilitate when building the templates.
1. Make settings for increased accessibility
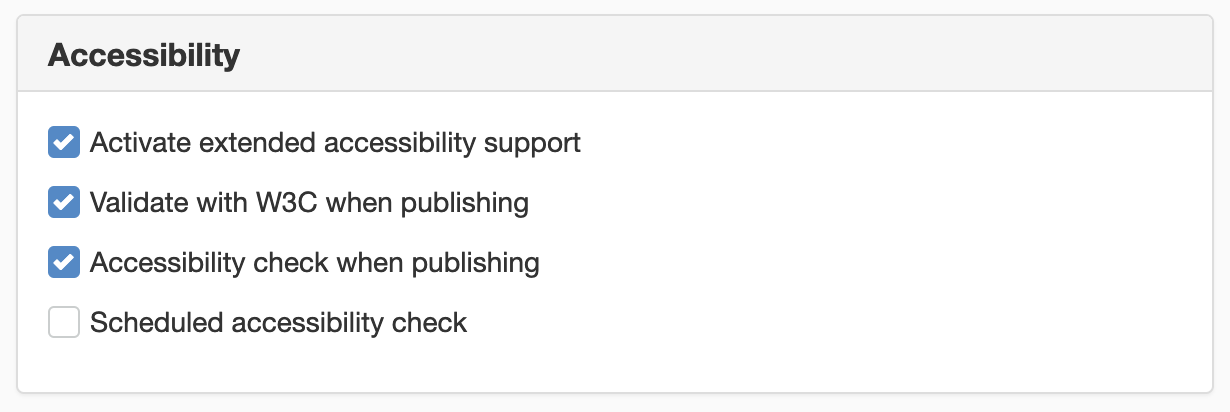
For increased accessibility on the website, you should first set Accessibility related settings. Here you should set the following:
- Activate extended accessibility support
- Validate with W3C when publishing
- Accessibility check when publishing
To do this, select Website settings. Select the General category and the Accessibility panel.
Use extended accessibility support
Means that SiteVision reminds the editor to enter image description texts, select column and row headings when creating tables, provide tips on how to use captions on links.
Validate with W3C when publishing
Check whether the code on the page validates when publishing. If the page validates, you will see "green results" or you will see "red results" with details about what is wrong.
Check accessibility when publishing
Checks whether the page complies with accessibility guidelines. The accessibility test checks that, among other things, header levels, if ALT and title are applied to text and images, accessible tables, do not use old attributes in the code. The accessibility test serves as the link check, and you get a result when publishing the page. If it goes well, "green results" appear:
2. Add colors
To facilitate the template build, add the colors you want to use as profile colors on your the website. To do this, select Website settings -> Appearance -> Colors. Here you add new colors or overwrite existing ones.
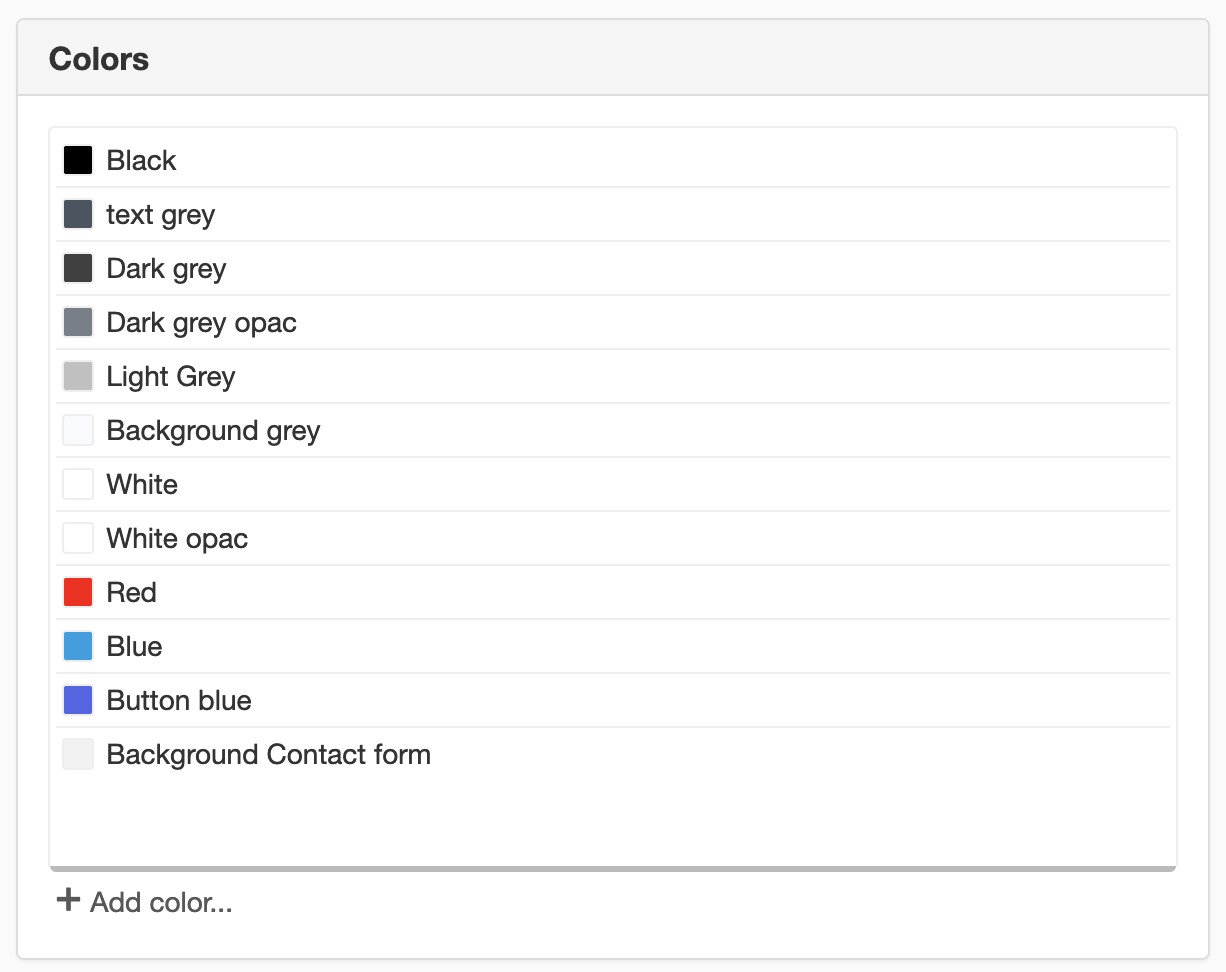
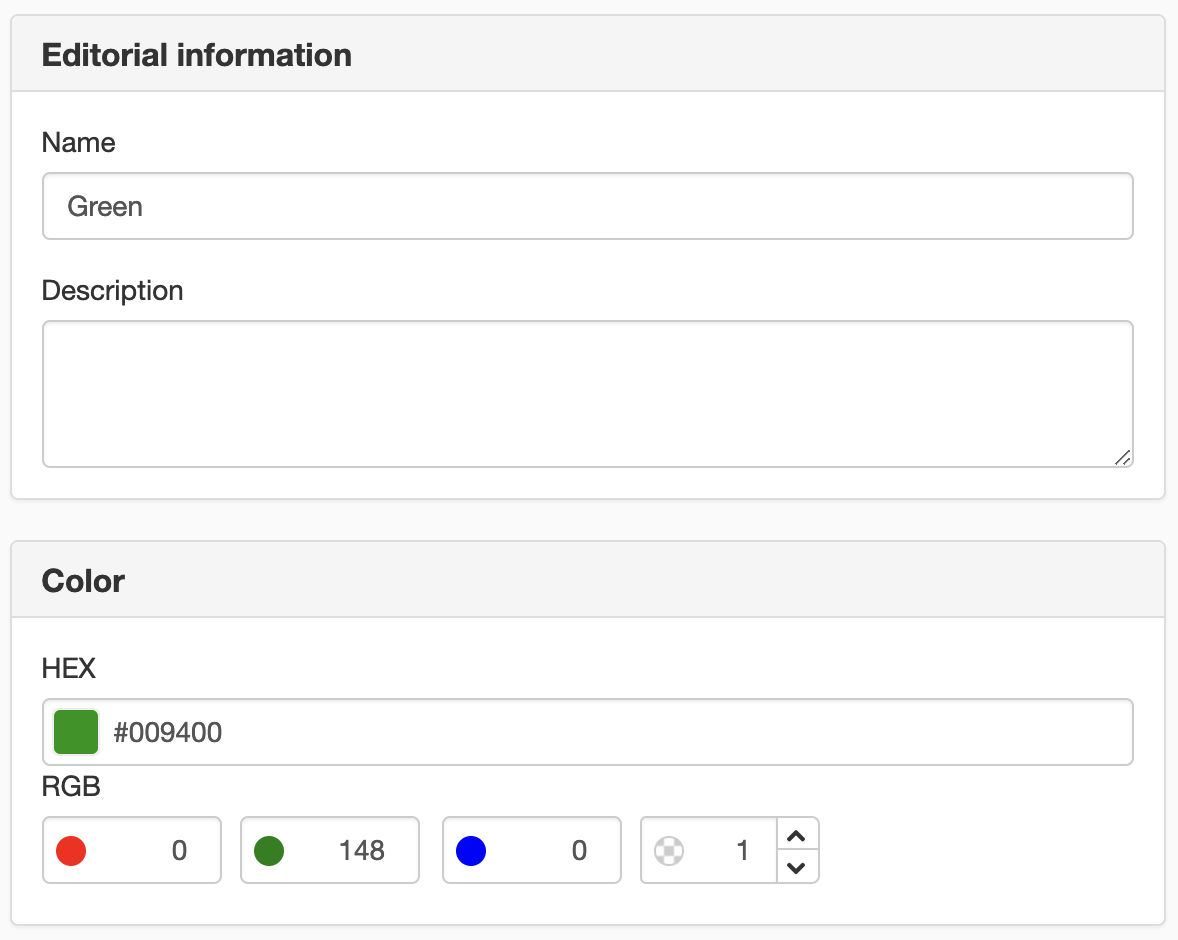
Click on the Add color link to add a new color. A new view appears where you can fill in Name, Description (optional) and choose a Color by specifying HEX code or RGB value.
3. Set font
Under Website settings -> Appearance -> font set the fonts that the editors will use on the website.
When you create a completely new site, five fonts are included as standard:
- Body
- Heading1
- Heading2
- Heading3
- Table heading
These fonts are set to relative dimensions (EM) that build on BODY. BODY is set to 1em by default (equivalent to 16 px). The other fonts are expressed as a percentage relative to BODY.

BODY - double click BODY to change the settings
If you want to use a different BODY size, just overwrite 1em in the size box. To calculate EM, take pixels/16.
For example, to correspond to 12 px, 12/16 = 0.75 EM.
Use point, not comma.
Then you fill in all other fonts in relation to BODY.
Select Properties on the font. In the Size field, specify how large the font will be in percentage (relative to the BODY font). If you want the body text to correspond to 16px, enter 100%. For a smaller body text, enter 80% for example.
The following is prefilled:
- Body, 100%
- Heading 1, 180% (h1)
- Heading 2, 150% (h2)
- Heading 3, 120% (h3)
- Table heading, 100%, bold
These can of course be changed.
When you add a new font, the size is stated as a percentage based on BODY.
Be sure to add fonts for the menu — these typically differ from regular body text that usually has underlined links. Menus usually do not have underlined links. If you want a different font on an active page, you can create a font for it as well.
4. Add metadata
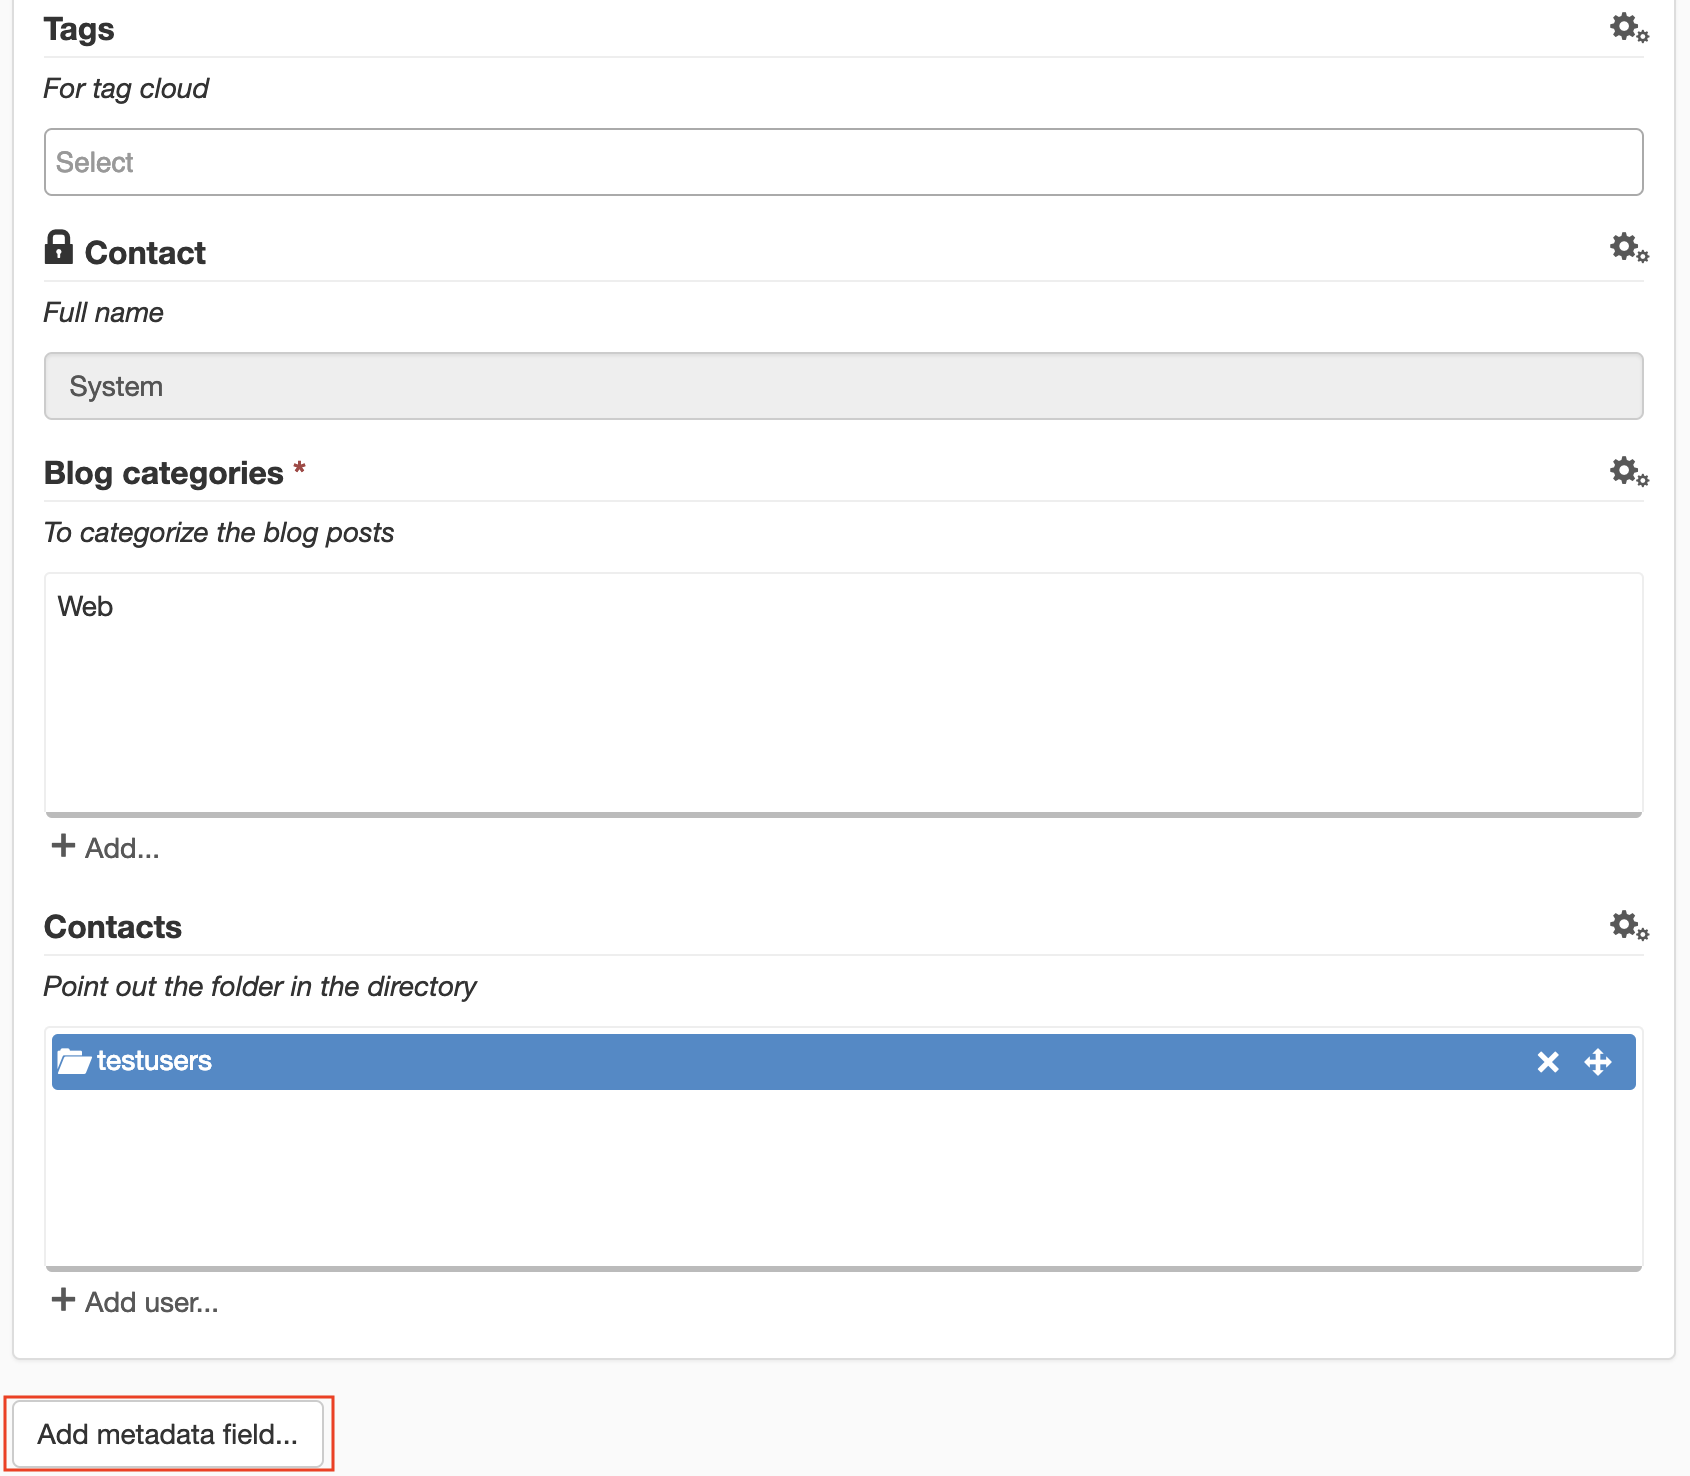
1. Select Properties -> General -> Metadata.
2. Click the Add metadata link at the bottom.
3. To add the date when the page was last published, select the System values type. Enter name and possibly a description.
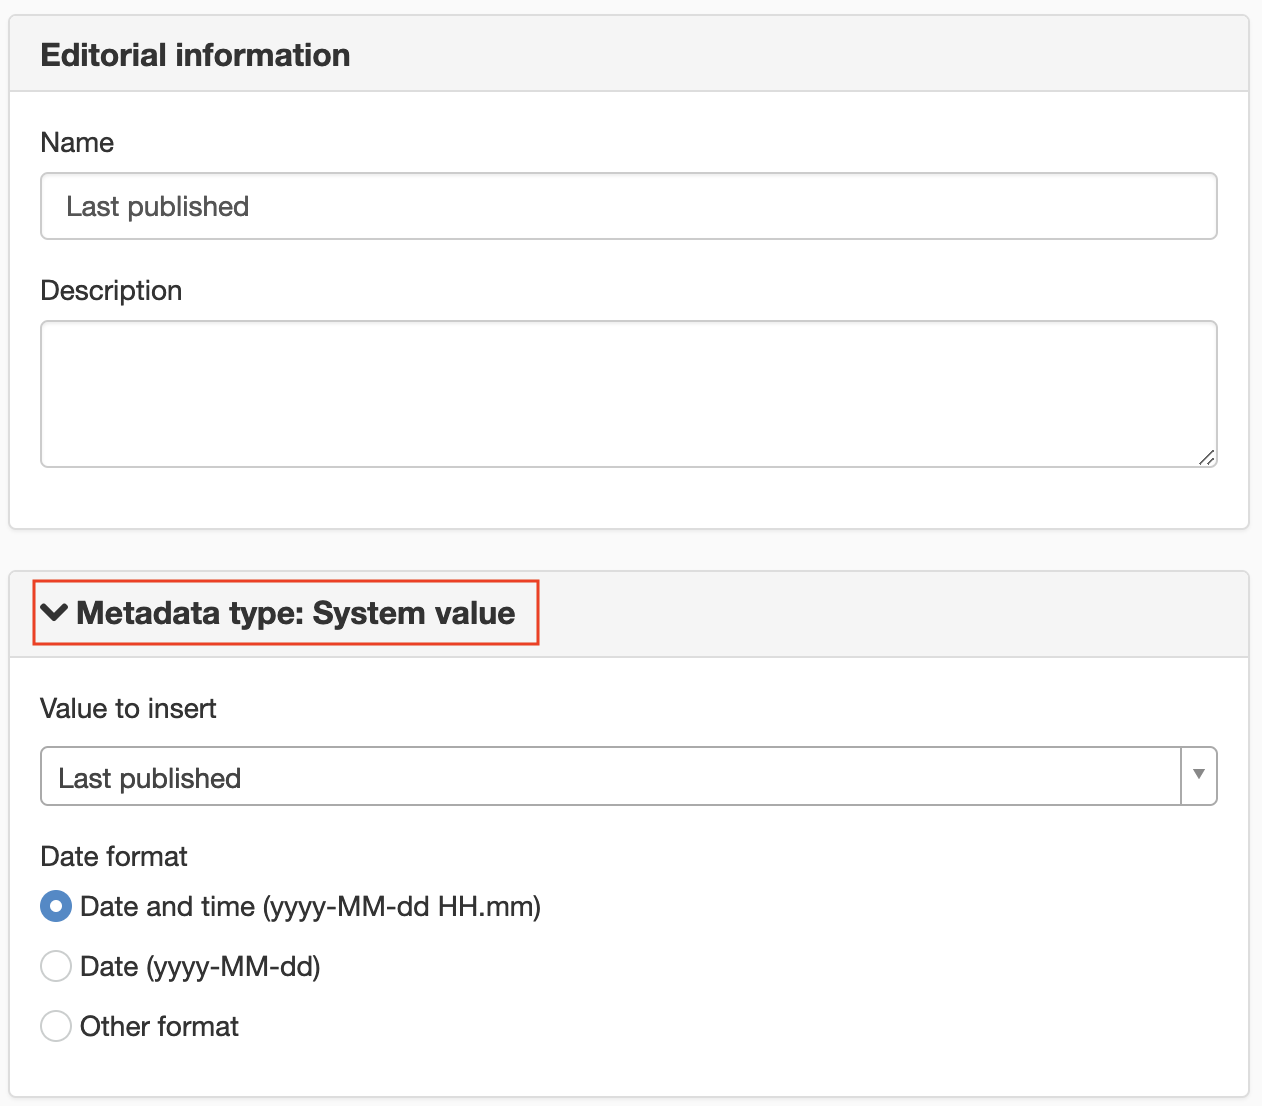
4. Under Metadata type: System value select:
- Value to insert: Last published
- Select the date format you want to use under Date format.
5. Select whether you want to permission-control the field under the Permissions tab. Here you will also find the Field may be inserted in modules (e.g. Text) box, which should be ticked to use this metadata field in the template later.
6. Click OK.
7. Continue adding the required metadata, e.g. Last published by. Repeat steps 1-5 but in step 4, enter:
- Value to insert: Last published by.
- Under User information, select User’s full name.
The page published:
 Print page