
help.sitevision.se always refers to the latest version of Sitevision
Start template
The start template has a wide column and two underlying columns. These columns will be 6 columns wide.
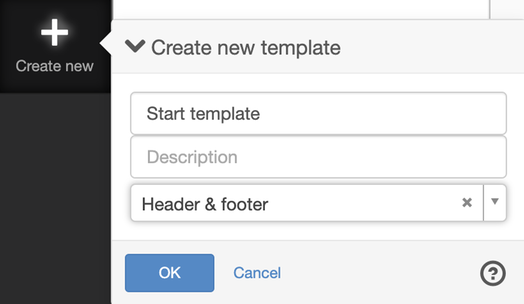
1. Select Templates for... (states the name of the website) and select the Create new template icon (in the sidebar).
2. Fill in the name and which template it should be based on. Name the template "Start template" and base it on the template Start template.
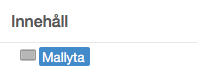
3. Now you will see the new template "Start template" under Page templates.
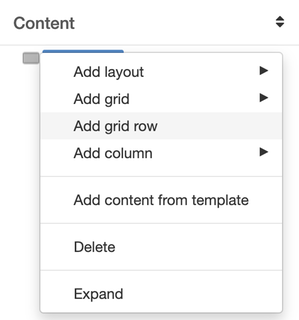
4. Under content you will now see the template area "Template area":
The line in the editing area is the template area, which marks the area that can be changed in this template.
5. In this template, the template area is divided into two rows of different sized columns:
- Row 1
- Centre column - 12 columns
- Row 2
- Centre column - 6 columns
- Right column - 6 columns
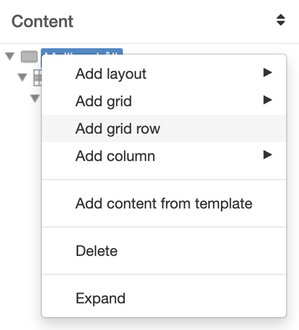
Select the template area "Template content", right-click and select Add grid row.
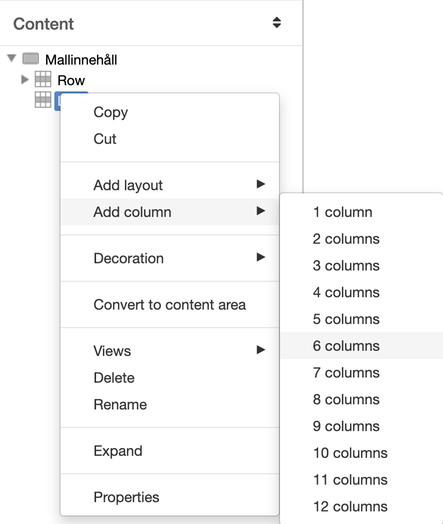
6. Select Row, right-click and Add column of 12 columns.
Note that step 5 is not necessary. Because you are going to use the entire area, it is enough to add a grid row (as in the Single column template). In this case, you just add a column of 12 columns to make it clearer.
Right-click and rename the column to "Top".
7. If you want, you can add an image to help the editor.
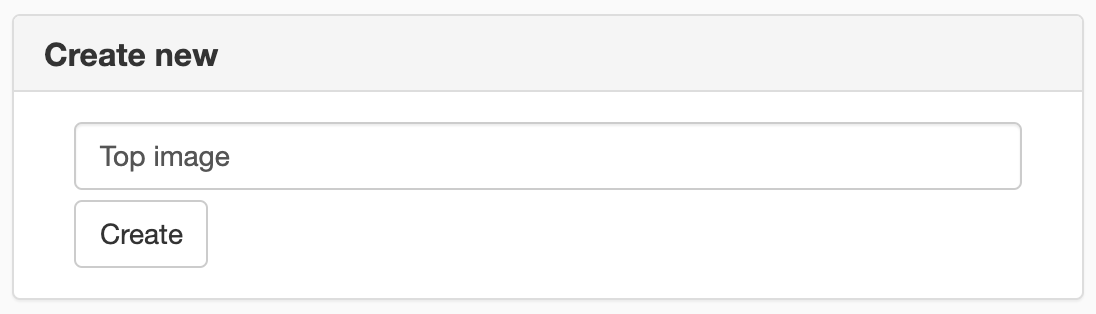
8. Select the column that we named Top right-click and select Convert to content area. Now there is no content area with a suitable name, so you need to create a new content area. Click on the Create new link. A new window opens. Fill in a name (in this case "Top image). Click Create and then OK.
9. Select the template area "Template area", right-click and select Add grid row.
10. Select Row, right-click and Add column of 6 columns. Right-click and rename the column to "Centre".
11. Select the column that we named Centre and click on the "Add text" icon.
12. Select the column that we named Centre right click and select Convert to content area. Feel free to use one of the pre-created content areas, such as Centre column. Click OK.
13. Select Row (at the bottom), right-click and Add column of 6 columns.
Right-click and rename the column to "Right".
14. Select the column that we named Right and click on the "Add text" icon
15. Select the column that you named Right, right-click and select Convert to content area. Feel free to use one of the pre-created content areas, such as Right column. Click OK.
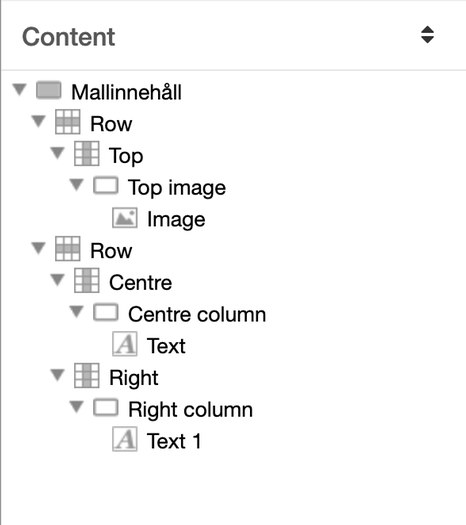
16. Under Content we have the following appearance:
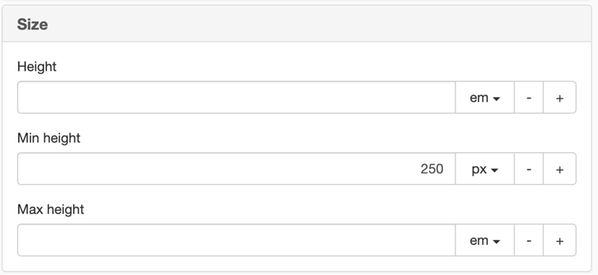
17. If you want a page that uses this template to always have a minimum height (so that the page does not look so compressed if you only have one line of text on the page), you can set this by selecting Row -> Properties -> Size -> Minimum height. Select any dimension (for height, you do not need to use percentage - that is only important for width when building responsively).
18. Publish the template. Done!
The page published:
 Print page