
help.sitevision.se always refers to the latest version of Sitevision
Add font - General
Here you can set preferences for how the font will look:
Editorial information
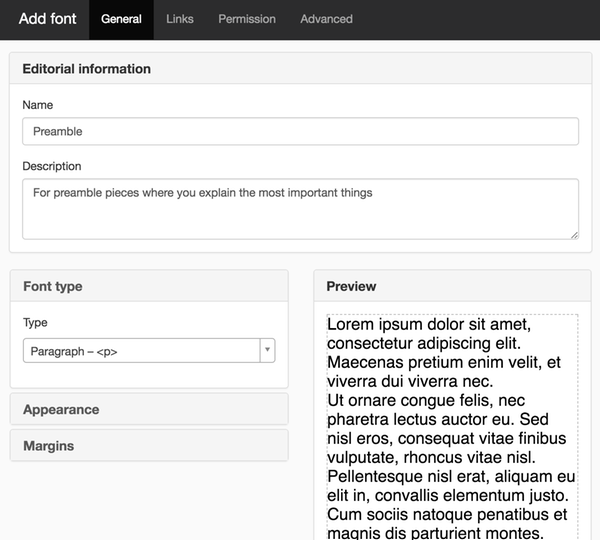
Name
Here you enter a name for the font. To change the name, click in the Name field and enter a new name.
Description
Here you can choose to enter a description, for example "First heading on pages". This text will appear as alternative text when you hover your mouse cursor over this style sheet in a module.
Font type
Type
Here you specify whether the font is to be coded as a heading, paragraph, or character style sheet.
- Paragraph <p> - Indicates the character formatting for an entire paragraph of text.
- Headings <h1-h6>-Indicates that the text is a heading.
- Single character <span> - Indicates the character formatting for single words and/or characters in a paragraph.
- Subscript <sub> - For subscript text.
- Superscript <sup> - For raised text
- Source code <code> -For program code
Paragraph
When creating a new font, the paragraph style sheet type is preselected because it is the most common type.
Fonts specified as paragraph style sheets will be covered by the HTML <p> (paragraph) tag in the code.
If you change a word in a paragraph of text to a style sheet that is marked as a paragraph style sheet, the entire paragraph will be affected and will use that style sheet.
Headings
From the point of view of accessibility, it is important to specify which heading level a heading belongs to in the code. The hierarchical order for the use of the heading levels is also important.
You can select six different levels of headings where h1 is the highest, and h6 is the lowest in the hierarchy. This means that a heading font that is set to h1 is used as the main heading. A heading font set to h2 is used as a subtitle etc.
Primary heading level
It is possible to have several different heading fonts for the same level on a website. For example, there may be a need for three different subheadings. Use the check box to specify which of the three heading style sheets should be the primary one, that is, the one to use when pasting and matching text with the correct heading levels from Word.
Only one primary heading level can be set per heading level. If multiple fontss within the same heading level are set as primary, the last ticked one will be used.
There are keyboard shortcuts for heading fonts. They can be used in text and table modules.
CTRL + 1 To get heading level 1
CTRL + 2 To get heading level 2
CTRL + 3 To get heading level 3
CTRL + 4 To get heading level 4
CTRL + 5 To get heading level 5
CTRL + 6 To get heading level 6
CTRL + 0 To return to the style sheet that is at the top of all style sheets (normally body text).
In cases where multiple fonts exist for the same heading level, the keyboard shortcut for the heading font is at the top of the list.
Characters
A character style sheet indicates the character formatting for single words and/or characters in a paragraph.
There are four different character style sheets where <span> is the most commonly used: <span>, <sub>, <sup>, and <code>.
Appearance
Font family
Here you can choose between Arial, Courier New, Georgia, Helvetica, Times New Roman, and Verdana fonts. These are so-called web-safe fonts, which means that most users have these fonts on their computers.
If you want to use a different font, you can enter it in the box yourself. Note that you must enter the full name, for example "Trebuchet MS". Because this font is not available by default on all computers, it is a good idea to add more names to fonts, separated by commas.
If you added a custom font, such as Google Webfonts, it will also appear in the list.
Color
Here you select the style sheet color. Displays the colors that are set under colors.
Size
You have the option to specify a text size in percent, em, rem, or pixels. For accessibility reasons, it is recommended that you use a relative size, i.e. percent, em, or rem. Visitors will then have a better chance of influencing the size of the text as needed. The following units can be selected:
- %- percent of body. Default is 100%.
- em - relative dimensions based on the enclosing element's text size.
- rem - relative dimensions based on the enclosing root element (HTML tag)
- PX - fixed dimensions, should not be used if you are building responsive web
You can enter the desired size. 100% is suggested by default.
Read more about different sizes or Relative dimensions
Line height
Set the row height for the font here. Inherit means that the row height is inherited from enclosing elements. Inherit is the default. The following can be selected from the list:
- Inherit
- normal (120%)
- 1.3
Bold/Italic/rescaleable
Here you select additional settings for the font
- Bold - Tick the option to make the font bold.
- Italic - Tick the option to make the font italic.
- Rescaleable The font is rescaled when using the Character size module. Tick the option if the fonts are indicated in pixels. For fonts specified in relative dimensions (em or percent), it is sufficient that the option is ticked in the BODY font.
Margins
Here you make settings for the margins for heading and paragraph fonts. Use a relative dimension such as em or percent. This provides a margin that looks the same regardless of whether the web page is enlarged or reduced (zoomed).
Margin top
To set the margin above the paragraphs or headings.
Margin top, first element
To set the margin above the paragraphs or headings that are at the top of a text module.
This setting is made to maintain margins between modules.
Margin bottom
To set the margin below the paragraphs or headings.
Margin bottom, last element
For setting the margin below the text paragraphs or headings that are at the bottom of a text module.
This setting is made to maintain margins between modules.
If the margins are left with the setting < Not set>, the browser's own settings take over. Set the values to 0 px (zero) if no margins are desired for the style sheet.
The page published:
 Print page