

help.sitevision.se always refers to the latest version of Sitevision
Publish - tab General
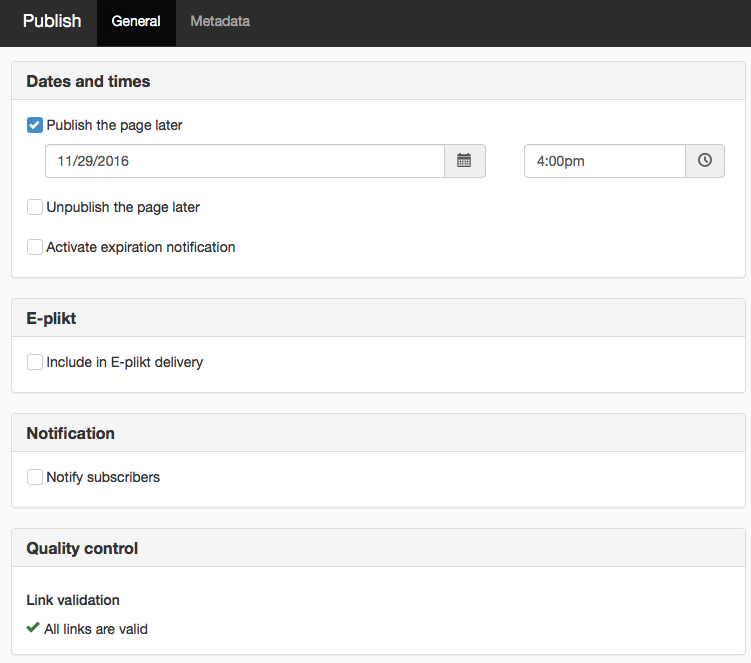
Dates and times
Here you can control the time of publishing if you do not want to publish straight away, or if you have a specific date to unpublish the page.
If you are want to manipulate the publishing date, you can do this in under Page/article properties.
Publish the page later
If the page is to be published at a later time, select this option and enter the time and date. Click the icon for the calendar to select dates in a calendar or enter the date yourself in the white field. The page will then be published at the specified time.
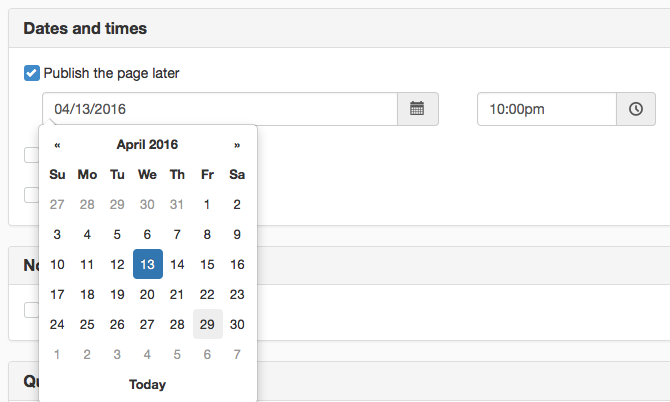
The "clock icon" in the navigator indicates that the page has a time-controlled publication. See example below.

If any of the overlying pages are not published, a "pause character" also appears on the page. This means that the page will be published when all the overlying pages are published.
Unpublish the page later
To automatically unpublish the page on a specific date, select this option and enter the time and date. Click the icon for the calendar to select dates in a calendar or enter the date yourself in the white field. The page will then be unpublished at the specified time.

The "clock icon" in the navigator indicates that the page has a time-controlled unpublication.
Cancel publishing and unpublishing
To cancel scheduled publishing or unpublishing, click the Stop publishing / Stop unpublishing as shown in the images below.


A message then appears and you can cancel scheduling. To cancel scheduling, you need permission: Unlock publishing schedule locks
Scheduled publish or unpublish pages cannot be edited without cancelling scheduling.
Activate expiration notification

Reminder is used to be notified that a page needs to be reviewed after a certain period of time since being published. The e-mailed reminder contains a link to the page. The recipient can then click on the link, read through the contents and decide if something should be changed, whether the page should be republished (approve existing content) or unpublished. In this way the pages are kept up to date with the correct content.
It is possible to centrally set this box to be checked by default. It is good idea, for example, to have a quality policy where all pages are reviewed after a certain period of time. This setting is only a recommendation, and you can uncheck the box in the publishing dialogue to prevent reminders.
Who receives reminders?
- Set recipient - The person who is set as recipient under Site settings -> Functions-> Best before
- The publisher - It there's no set recipient then the the person who published the page (at the time the reminder was set) gets the reminder. That is, if they have their e-mail address in the directory service.
- Site manager - If the publisher lacks an e-mailadress then the reminder go to the e-mail address set up under Site settings -> Email
- Server manager - If there's no Site manager the reminder goes to the e-mail address set up on the server object.
Only one of the above will receive the reminder unless more recipients are listed in the recipient list under Site Settings -> Best before.
When is the reminder sent?
The system suggests in 6 months time unless changed centrally, see Central settings for best before.
If you have checked the box, this date is left as is (the system does not suggest a new date), but you can change the date if you want.
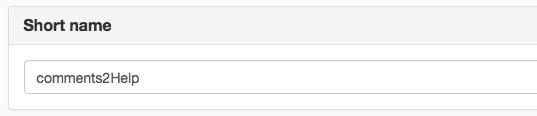
Short name
If you have a URL style that contains a short name, the Short name field also appears where you can give the page the short name you want:
The Swedish Legal Deposit Act of Electronic Material (e-plikt)
If you have permission, you can determine whether this page should be included in the Swedish Legal Deposit Act of Electronic Material to the National Library of Sweden. Here you can find out more about e-plikt External link, opens in new window..
This function requires you to have "Publish for e-plikt" permission
Notification
Notify subscribers
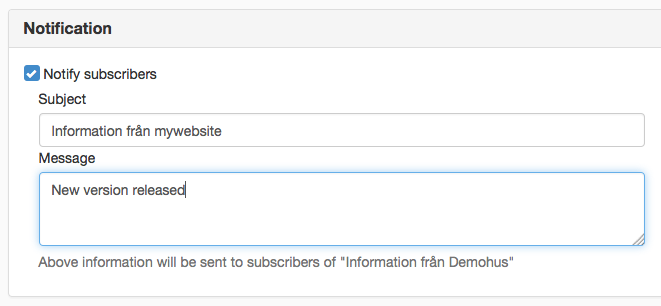
This option is only visible if the subscription is set-up on the current page.
Used in connection with subscriptions and when you want to send a notification to subscribers. Mark the "Send notification to subscribers" box and enter a message.
Quality control
If the link test, availability test and/or validation test when publishing are enabled centrally, these will start after you click the Publish icon. If all links work, if the page validates and has no availability errors, it will turn "green".
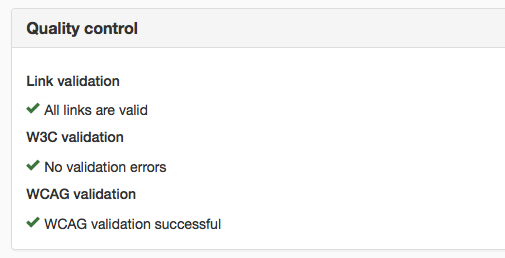
If there is a link error, validation error, or availability error, the General tab turns brown:

Link check
If there are incorrect links on the page, a different view is displayed:

Click the Show details link to get a report of the incorrect links.
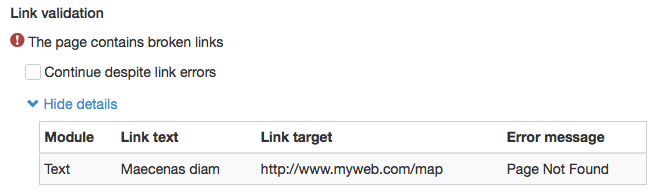
In this case, the Abstract module has an incorrect link. A link with an incorrect address.
Continue despite link error is a permission and not everyone has this option. If you do not have the permission, the Publish button will be inactive until you have corrected the incorrect link.
W3C validation check
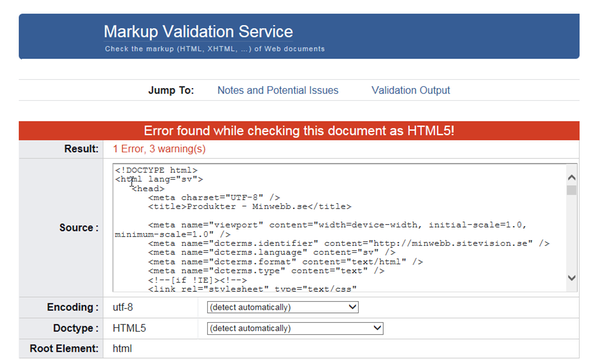
Checks whether the code on the page validates. If the page does not validate, a "red result" is displayed:

Click the link Show details. This will take you to the W3C validator where you can read more about the validation errors:
Accessibility check
Checks accessibility rules when publishing, e.g. that heading levels are in the correct order, that tables follow certain rules etc. Learn more about what is checked in the accessibility checks here.
If the page shows a "red result," click the Show details link. More information about the error then appears:
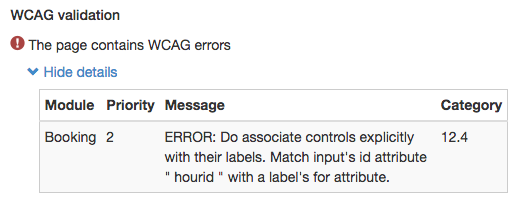
If the page shows a "red result," click Show details.
Publish
Click this to publish the page — so that it appears online. If you choose not to publish the page, it will only appear in the editor. For example, if you make a draft of a page and do not want to publish it straightaway.
Publish and show
Click this to publish the page and visit it online. This is the same as clicking on the Done icon in the sidebar.
Cancel
Cancels the current publication and returns you to the editor.
The page published:
 Print page